Thursday, December 31, 2015

Historical Food Fortnightly 2016

I am going to be participating in the 2016 Historical Food Fortnightly!


I did half the year in 2014, and really enjoyed the experience. I am looking forward to this year's challenges, and lots of combined historical cooking and costume posts!

Thursday, November 19, 2015

How to be Happy in Costume in Winter

With winter right around the corner here in Minnesota, I've put together my tips for being happy in the cold while dressed up in costume.

I originally thought to title this post "How to Survive the Cold in Costume," but I realized that we don't just want to get outside in the cold, snowy weather and survive, we want to be comfortable enough to have fun! We're not talking simply walking from your car to an event, but events where you'll be outside for a long period of time.

Most of the tips below were written with Victorian-era costuming in mind, but can definitely apply to other eras.

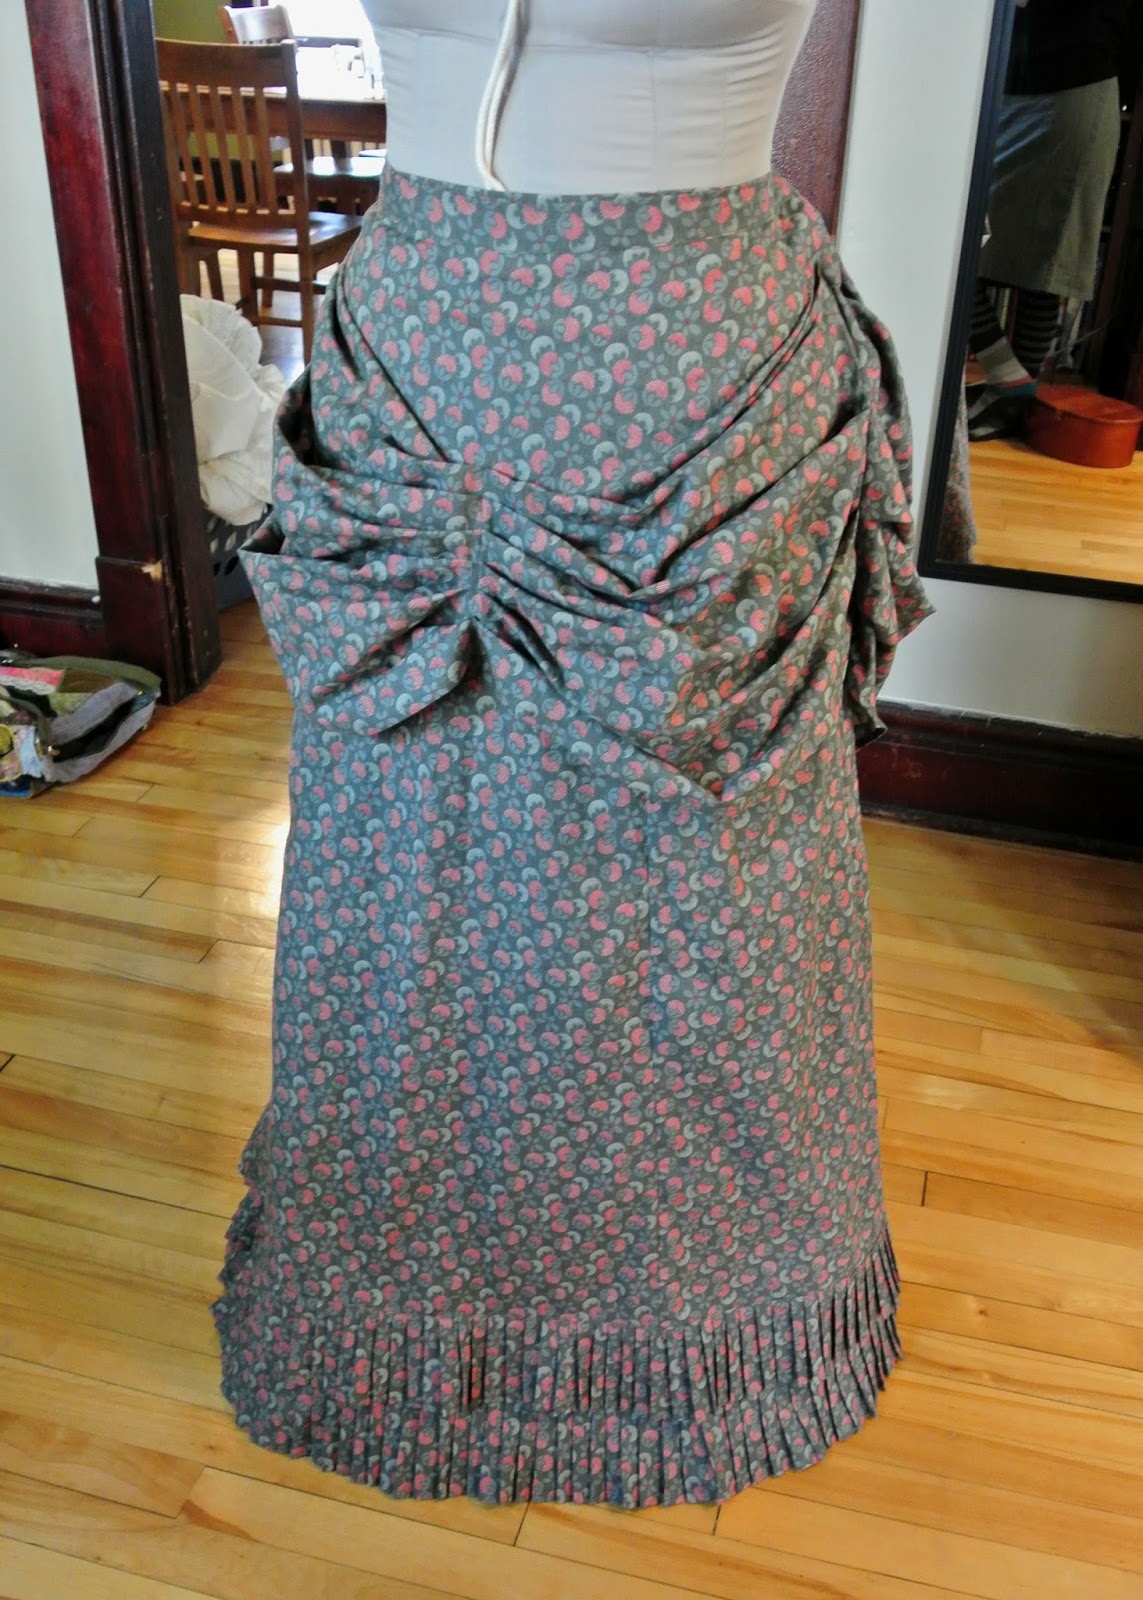
1.) Wear layers. If you are dressed in historic costume, you are probably already doing this, right? But you can add layers to your already-existing ones: narrow under-petticoats for warmth, long-sleeved corset covers or combinations, coats, capes, and hoods. Air trapped between layers of clothing insulate your body from cold and wind and keep you warmer. More layers = more air.

Layers also allow you to make adjustments throughout the day as your body temperature or activity level change. You might take off your shawl or hood while ice skating, but when you stop moving you're going to cool down again. Layers = flexibility.


2.) Wool is your new best friend. Truly, wool can do anything. Smooth, fine wools make stylish dresses. Thick, soft wools are perfect for outerwear. Felted wools like Melton can be almost wind-proof. It's historically accurate for almost all periods. And nothing is going to provide breathable insulation like wool.

Wool will continue to insulate even when it gets damp, and wet wool dries faster and feels much less heavy than wet cotton or other plant-based fibers. It breathes well, and wicks away sweat and moisture. Plus it's beautiful and so dreamy to sew on.

If you find wool itchy, you have a couple of options. First, did you know that wool feels more itchy at warmer temperatures? That prickly, unbearable wool you rejected in summer might feel perfectly acceptable in December. Try it when you actually feel cold and it might feel different to you.

Second, you can look for cashmere. Yes, it's much pricier. But it insulates wonderfully and is very, very, soft.

Finally, you can use wool for outer garments only. By keeping a barrier of cotton or silk between your skin and the wool, you can reap all the insulating benefits and avoid the scratchiness.

A lot of folks mistakenly believe they are allergic to wool, when in fact, they have just never experienced good-quality wool that doesn't scratch. Keep an open mind. However, if you truly do have a wool allergy, a polyester or acrylic suiting is still better than cotton for keeping you warm.

3.) Wool socks are non-negotiable. I know, I already covered wool. But socks deserve their own comment. Even if you keep your trunk warm, cold temperatures can be dangerous for feet. My favorite wool socks are made by Smartwool. They are warm, breathable, machine washable, and made of super fine non-itchy Merino, blended with nylon for strength and elastic for stay-uppiness. The solid knee-high or over-the-knee socks are usually best for costumers.

Liner socks give you extra insulation without the bulk of wearing two pairs of socks.

Make sure you buy your shoes, boots, or ice skates large enough to wear thick socks and liners. You may want to go up a half size, or try a wider width. You want a little bit of air inside your boot to help insulate.

As above, if you are truly allergic to wool, acrylic is your next best bet.

4.) Cover your extremities. Mittens are less stylish than gloves, but warmer. If you wear gloves, leather or faux leather are going to block more wind than cloth or knitted ones. And don't forget about muffs!

Winter hat, coat, and muff 1886

If you're a knitter, check out the historic knitting group on Ravelry for ideas and sources for knitted accessories. Felting, double knitting, and Fair Isle (stranded colorwork) techniques can all make knitted accessories warmer and more windproof.

5.) Headwear. There are plenty of fancy winter hats depicted in fashion plates, but if you are outside for any considerable period of time, you will be much, much happier with your ears covered. Hoods, close bonnets, and fine woolen shawls or veils are quite practical.

Fur-trimmed winter hood 1870
Lady on the right has a hood or shawl softly wrapped around her head. Lady on the left is jealous.

You can also comb your hair over your ears as this provides a surprising amount of insulation. Hair worn this way is seen between about 1845-1870.

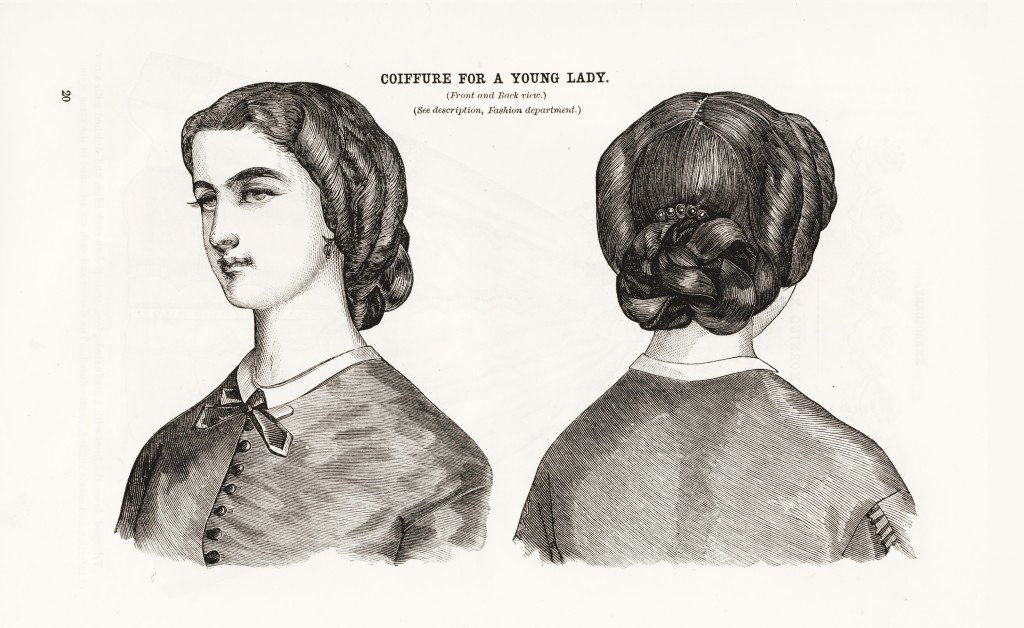
Hair dressed over the ears 1860

6.) Protect your skin. Cold air holds less moisture, and cold, dry air sucks the moisture out your skin. Cold, hard winds can give you a windburn. Cover as much exposed skin as possible, and use lotion on any skin left exposed. Creamy, fatty lotions are the best. If you shudder at the thought of putting a thick lotion on your face, just know that dry skin can soak it up like a sponge. It probably won't feel as greasy in cold, dry weather as it may have in warm weather. Ditto lip balm. Crusty lips are no fun.

7.) Eat a lot. I like this one. Just standing around outside, keeping your body warm burns up calories, so make sure you are well fed! Warm drinks are also a plus.

8.) Bring handkerchiefs. Cold air makes for drippy noses. Not fun, but it's true. Plain cotton hankies are functional and pretty ones with lace and embroidery make a great accessory!

Lady with handkerchief
Embroidery pattern for pocket handkerchief, Godey's 1861

Hankies for everyone!!

9.) Stay active. Nothing is colder than sitting still. Get up, take a walk, run around. Skate, sled, jump up and down!


Skiing with composure

10.) Take breaks. It's not a marathon. Go inside and warm up every now and then.

11.) Enjoy it! Instead of thinking about the cold, focus on the fun you're having: skating, walking through a snowy wood, or just being dressed up with friends!

12.) If all else fails, cheat. Above all, you want to be happy and safe. If that means you wear modern long underwear, then do it! Modern boots are much warmer than historic repros, which are typically made of leather with no insulation at all. If you do wear repro shoes, then absolutely use beeswax or a silicone waterproofing spray on them.

Do you have any other tips for cold weather happiness? Let me know!

Tuesday, November 3, 2015

A green lace dress

I made this dress for a display garment for work. It's made of olive green lace underlined with pale green silk shantung.


 I used New Look 6370, a dress with a princess-seamed bodice, waist seam, gathered skirt, and half-length sleeves. I made no alterations to this pattern, other than adjusting the bodice for fit.


It really does fit me better than it fits the form!


The lace I chose did not have a scalloped edge, but I knew that the regular motifs could be trimmed to make a nice decorative edging. It was time consuming trimming all that lace, but I think it worked out well!


I hand-picked the center back zipper. SO much easier and prettier than trying to make it cooperate with the machine. 


The pattern calls for a lining in the bodice only. I used Bemberg rayon, which went in very nicely. I had to choose this icky beige color because my green lace was impossible to match. The lining was joined by machine at the neckline and finished by hand at the CB and waist seam. I like the lined bodice; so much nicer than fussing around with neck facings.


For the armscye seam, I followed the pattern's directions to hold the bodice and lining as one while setting the sleeve, then I serged that seam. In retrospect I probably should have kept the lining free and then hand-tacked it in place at the armhole as was done elsewhere.


This dress is currently on display at Treadle Yard Goods.

Wednesday, September 30, 2015

Red satin gown for the 6 year old

I made this dress for my 6 year old daughter for the local Renaissance Festival.


It's made from a lightweight silk and cotton blend satin (in her current preferred color: RED!). I interlined the skirt with a plain weave linen to give it more body. The bodice is interlined with cotton twill and lined with the same linen as the skirt. The hem of the skirt is edged with deep red petersham ribbon. I stitched two rows of narrow gold trim around the neckline.

The sash is made from a soft yellow-gold silk. I sewed a length of silk into a tube on the machine, turned and pressed it, then pleated each end and sewed on a tassel. I made the tassels from metallic gold thread and white silk and linen threads.


The bodice closes in back with hand-sewn eyelets and there is a bone on each side of the opening. I offset the eyelets for a spiral lacing.


The sleeves are made of two layers of blue-ish grey linen, trimmed with black petersham ribbon. The sleeves tie into the bodice; two lengths of black twill tape are sewn to the sleeve and a small brass ring is sewn to the bodice lining at the shoulder point.


Both the gown and the sleeves were patterned from diagrams in The Tudor Child, a super awesome book I highly recommend. Since my little one is a bit small for her age/height, I knew the 6-yo size pattern would be large on her, so didn't scale the pattern up exactly, but instead used the pictures as a guide to draw my own pattern to her measurements.

I have to confess I made the skirt a little skimpy because I was being cheap. It is gored smoothly in front and pleated in back.

I made everything mostly by machine, partly by hand, following the "no visible machine sewing" rule. So the main construction was done by machine and edges, linings, and eyelets were sewn by hand.

There is a petticoat of the same grey linen as the sleeves, trimmed with wider black petersham. The petticoat is just a rectangle, pleated all around, with a strip of wool batting in the pleats in the sides and back, to give a rounded shape. The petticoat is held up with two lengths of wide twill tape, sewn on like suspenders.


The shift details can be seen in this post. The cap is from her last costume. I made it when she was 3 and I am amazed it still sorta fit!

She loved her dress and enjoyed wearing it all day at the festival!

Wednesday, September 23, 2015

A shift for a 6-year-old girl

I made this little shift (or smock) for my daughter for the upcoming local Renaissance festival.


It's made of white cotton lawn. Why cotton lawn and not linen? I have no idea. Not sure what I was thinking. I guess maybe I wanted something very fine and sheer? But we do have a very nice fine handkerchief linen at work I could have used. Oh well, next time!

I cut this following the diagram in the book The Tudor Child. The book advises not adding seam allowances and just sewing them very narrow, 1/4" or less, but I wanted a wider allowance so I could make French and flat-felled seams more easily. I am very picky about a totally clean interior finish!

I started sewing it on the machine, and decided I would just hand-sew on the lace at the end. But I figured if I am handsewing the lace I may as well hand sew the neckband as well, and then I thought about maybe just handsewing everything that shows, and the idea of doing a little handsewing was appealing, so I went with it.

I could have done the whole thing by hand, but I just wasn't in the mood. For one thing, kids grow out of stuff so fast, and for another, this is going to be worn at the Renaissance festival, so hardcore accuracy is definitely not required!

So: the French seams at the shoulders and sides are machine-sewn. The flat-felled seams are machined for the first pass and then the edges are stitched down by hand. The neckband and cuffs were machined on the RS and the inside edge was hand stitched down. The neck slit is hand-hemmed. I actually did not hem the bottom, I just cut the body on the cross-grain and the lower edge is a selvage.

The sleeve seams are felled to each side so the sleeve end could open into a slit. As soon as I finished felling one sleeve seam, I realized I could have made the seam allowances MUCH tinier. (The Tudor Tailor was right.) They look huge! Alas. Another thing for next time!


The underarm gusset is felled all around, and the armscye seam allowance is pressed toward the body and felled.


This lace is synthetic, but I would never have guessed if I hadn't done a burn test. I thought it looked like a cotton bobbin lace and gave a historic enough feel.


The buttons are Dorset thread buttons I made using the directions in the book 50 Heirloom Buttons To Make. They are sz 50 linen thread over a metal ring. The button loops are also made in linen thread, and I stitched over the loops with a buttonhole stitch.

Next up: petticoat bodies and a gown! Little clothes are fun!

Sunday, August 9, 2015

Evening Bodice for the Green and Teal Bustle Dress

I planned to wear my Green and teal ruffled bustle dress to Costume College this year, but I wanted an evening look. I had saved just enough fabric to eke out this evening bodice to go with the skirts.


Having two bodices to go with your skirts is an economical way to get more mileage from expensive fabric. The Victorians did it, and we should too! 


I used the same bodice pattern as the day bodice for this dress, but altered the neckline and made the lower edge shorter all around, but especially shorter over the hips. Like the day bodice, it closes in the front with hooks and eyes, and has non-functional buttons made of grey silk sewn over wooden molds.

Also like the day bodice, it is flat-lined in light brown polished cotton, and the edges are finished with self fabric facings. There are spiral bones in the curved side back seams and straight white steels in the front darts and side seams.

The sleeve is a small puff with a fitted lining which I borrowed from an 1860s pattern.

Unfortunately, I ran out of time to trim this bodice up properly, so I just made a large double bow from the grey taffeta and pinned it to the bodice front.

I've accessorized with large rhinestone earrings and a rhinestone necklace (from Target!). In my hair I have white flowers and a pearl and rhinestone tiara. I carried the gold-ish patterned silk reticule I made for the day version. My hair is about half mine, and half false.

Saturday, August 8, 2015

A Little House Dress

I have been obsessed with the Little House books by Laura Ingalls Wilder since childhood, and I have always wanted to make a dress inspired by them. I got my chance recently, and made this dress for Costume College 2015. 


We had a small meetup of Little House enthusiasts! 


Laura Ingalls wrote about receiving a copy of Tennyson's Poems for a christmas gift, and having a particular fondness for his works. I obtained a small copy of selections of Tennyson's poems to use as a prop for my costume.


At Costume College I also taught an Irish Ceili dance class while wearing this dress.


Dress notes: The dress is made in the style of 1883 in a cotton print fabric from Moda. Being from Minnesota I really ought to have made something from when Laura Ingalls' family was living closest to where I am, but I just felt like doing '80s, even though they were in Dakota Territory by then. While not a direct reproduction of any of Laura's dresses described in her books, I wanted to make something that she or someone in De Smet might have worn.

Laura in De Smet, Dakota Territory in the 1880s.


I was inspired by these two dresses in the book Fashion in Detail, made in small scale cotton prints.


Construction: I made the skirt with French seams so I spent some time fiddling with making the pocket and placket cooperate. A couple internet tutorials helped: in-seam pockets with French seams from Sew Mama Sew, and skirt placket in a French seam from Diary of a Renaissance Seamstress. The skirt has a wide hem facing of plain cotton.

I sewed four lengths of twill tape inside the underskirt, one each at the two side front and side back seams. These tapes had hooks at the ends which connected to eyes in the skirt seams, enabling me to shorten the skirt temporarily to teach dancing.

The bodice is flat-lined with plain woven cotton broadcloth. The sleeves are lined with cotton lawn, and have a wide facing at the wrist so the full-length sleeve can be cuffed into a 3/4 sleeve. The bodice closes with functional buttonholes and metal buttons depicting oak leaves and acorns. The entire dress was sewn on the machine. I only hand sewed the edges of the bodice facings.

There are spiral bones in the curved side back seams and straight white steels in the front darts and side seams.

Patterns: the bodice pattern is from the green ruffle dress. I altered it by raising the shoulder line, creating a new neckline, adjusting the lower edge shape, and making a narrower sleeve, all to make it more 1880s than 1870s.

The skirt pattern is the 1883 skirt from the book The Cut of Women's Clothes by Norah Waugh. The overskirt I made up and draped through trial and error.

I copied the front pleated overskirt detail from one of the Fashion in Detail dresses. The overskirt back is made into puffs held up with hooks and eyes sewn onto twill tape. Because the puffs aren't permanently sewn, ironing and storage are a little easier.


Undies: Laura describes her preference for a smaller bustle in one of the later books, set in the mid-80s when the bustle was at its peak, so I made a small ruffled pad to fill out the late Natural Form shape. I also wore my white Victorian corset and a single, ruffled petticoat.


The lace: I knitted a small strip of lace to trim the neckline. The pattern is French lace from the Ladies' Guide to Elegant Patterns (Ravelry link). I knitted it on size 000 needles with sz 12 DMC Perle cotton.


Tuesday, July 14, 2015

Orange silk taffeta robe a l'anglaise

I made this dress for the June 2015 18th Century Picnic with the Historic Recreation SocietyI used the J.P. Ryan Robe a l'Anglaise pattern. This and the two petticoats are entirely hand-sewn.


The front closes with pins. The back poofs are created by tying two twill tape ties together on each side, a method I saw on an extant dress in the book Costume Close-Up. One is at the side back waist and the mate is about 12" up and 24" in from the front opening. I tied them with about 6" distance. I liked this method because I didn't have to worry about having a pretty cord that matched, and also I can wear it in the future as a plain open gown if I like.

I am wearing it over a shift, my green cotton twill stays, my new divided bum pad, a linen petticoat, and a sheer cotton petticoat with a woven stripe. On my feet are a pair of Fugawee Annas and some white clocked stockings from Jas. Townsend. I also have two pockets tied on and a cotton lawn neckerchief. My hat is a plain straw that I re-trimmed with orange flowers, a white feather, and a strip of green silk faille pinked and used like a ribbon. I wore glass pearls in my ears.

Construction photos:

I did not use the directions in the J.P Ryan pattern. Instead the seams were lapped and sewn from the right side with a spaced backstitch, as described in Costume Close-Up.


For the trim, I cut 1.5" strips with my rotary pinking blade and used graph paper as a pleat guide. I made 1/2" box pleats spaced 1/4" apart.


The bum pad, the design of which I owe to A Fractured Fairytale. After I made it I ripped and re-sewed the pads to move them a little closer together.


A linen petticoat I handsewed with linen thread.


The striped cotton petticoat I handsewed with cotton thread.


A detail of the cotton petticoat's pocket slit. I hemmed the edges of the slit and added a thread bar to reinforce the bottom point. The point and the bar have buttonhole stitch worked over them.