Katie sent me a delightful box of goodies. A pre-made, silk-covered blank bonnet from Timely Tresses was the base.
Loads of lovely flowers and ribbons from Etsy!
I consulted several fashion plates for design inspiration, including these. Katie asked me to just be creative with the design, and also said that more is more!
I started with a double layer of gathered cotton net. This was easily the most challenging part. It's very hard to do any sewing on the tight inner curves inside the bonnet.
I tacked the net at the far back, the edge of the brim, and at the midway point.
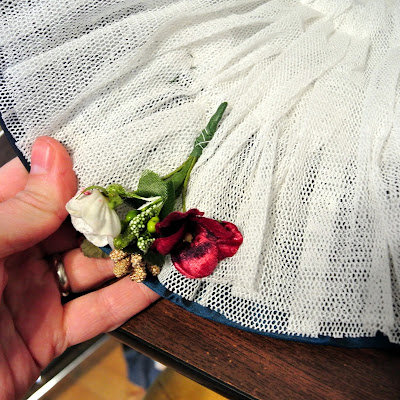
Flowers were next! I had several bunches of flowers, velvet leaves, glass berries, and golden and green sprigs to work with. I started with the ones for the inside of the brim. I gathered a few flowers and things into tiny bunches like so:
Then I wrapped their wire ends together and covered them with floral tape. If you've never used floral tape, you should know it's amazing. It has a papery texture, it stretches, and it only sticks to itself. Perfect for covering up all the wire and locking everything in place.
Several of the finished sprigs, before taping.
I sewed them down with white thread at the edge of the inside brim.
As I went along, I pulled the net over the stems and tacked it down to hide the stem ends.
I played with the layout a lot before committing. A lot of 1860s bonnets have just a few flowers, or one central bunch, or a bunch off to one side. Katie told me more is more, so I just went ahead and filled the whole inside brim!
I started sewing them to the leaf base, crossing their stems.
All sewn down!
Finally, I bent the stems back up to cover all the sewing. The finished piece!
I cut several loops of ribbon to pleat and lay under the flower piece.
To trim the outside, first I sewed two pieces of ribbon over the crown, pleated the long way to give them texture and help them shape over the curve. Then I added the loops and the floral piece right on top.
The last step was to add the chin ties. I used two lengths of ribbon, cut the ends at angles, and sewed tiny hems. Then I pleated up the other end into a little fat stack of pleats so it was only about 1/2" wide, and sewed it to the pointy tip of the bonnet brim.
The ties are about a yard long to make a nice full bow.
Here's Katie wearing this bonnet at an event in Gettysburg! I love the way it coordinates with her dress!
This was a super fun project. Trimming hats is definitely my cup of tea!


So pretty!
ReplyDeleteYou certainly have a knack for beautifully accenting a hat.
ReplyDelete