Sunday, August 2, 2020

New Dolls and Wee Wonderfuls Pattern Review

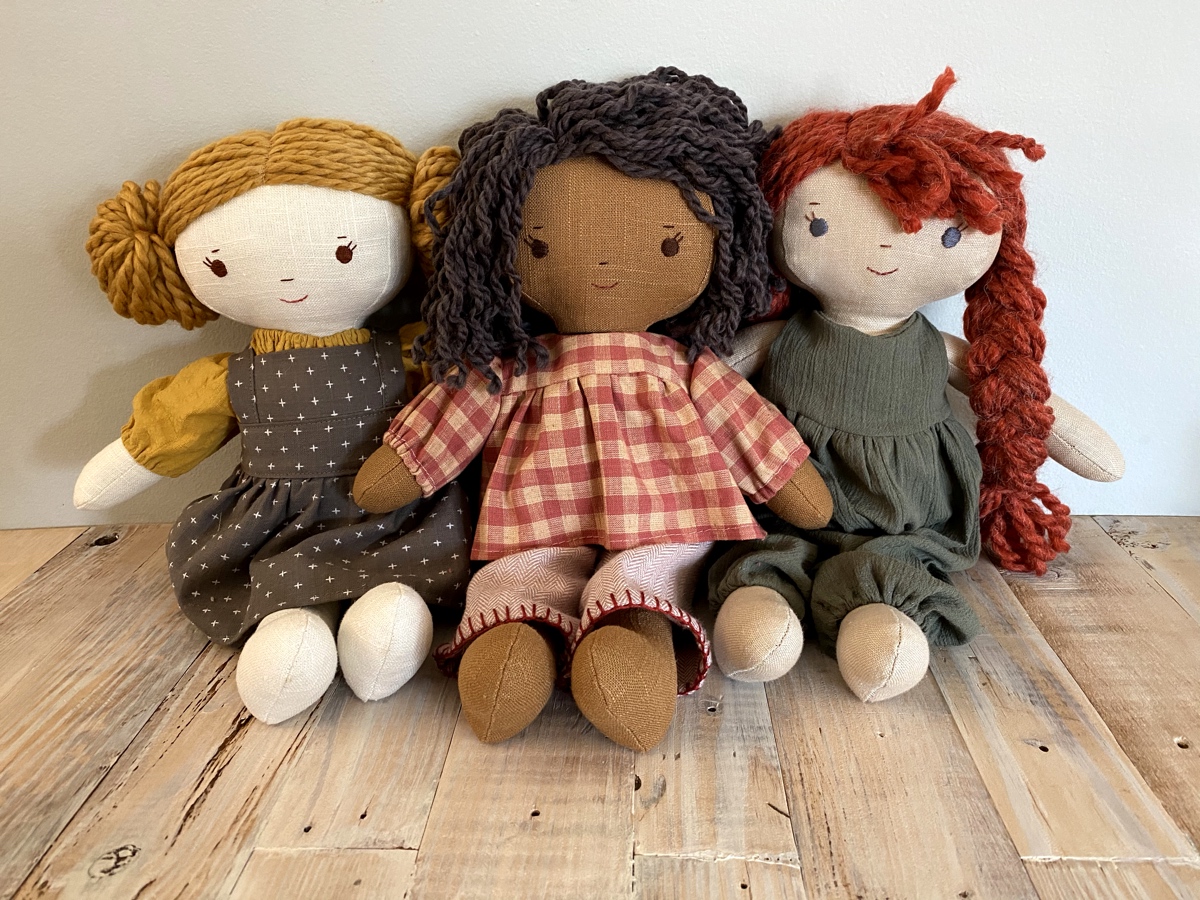
I had such a blast making my new Wee Wonderfuls pattern, Kit, Chloe, and Louise!

I made two dolls, one as a gift for my little niece and one to keep at home for my own kid. (If you can't guess which is which I'll tell you - my kid picked out the blue hair!)


I made both dolls from a nice firm cotton broadcloth in a light skin tone. When I went to Treadle to pick this up there was a broad array of skin tones to choose from, dark brown all the way to light beige. Although this fabric wasn't specifically for dollmaking I liked all the human-colored options!

The first time around, I sewed a side body panel upside down. After that I found it helpful to mark the top of each piece with a small T.


The first doll I sewed had sort of squarish corners to her face (left). On the second doll (right) I tried to make the face rounder.


Instead of following the seam's shape exactly I rounded off the sharp corners. This meant that I was sewing at about 3/8" instead of 1/4" around the corners. You can sort of see this below. I think it made a difference!


I managed to avoid a gap at the top and bottom of the body by sewing each stitch line 1/4" shy of the edge, then having the next stitch line just meet the previous one.


When the body was together, I trimmed all the seam allowances with a pinking shear (to avoid having to cut tiny notches). I clipped into the seam at the neck.


I was not happy with the splayed legs on the first doll (left).


I used a ladder stitch to draw the front of the leg up a bit and straighten out the angle.


This made a weird fold in the leg but whatever.


After (left)! For the second doll (right) I overlapped the leg centers about 1/2" and also eased the top of the leg into the body. This also helped to straighten out the legs. If I make this again, I will shape the top of the leg pieces to create this same effect with less fuss.


Played a bit with the angle I sewed the arms on each doll.


The eyes were a bit too wide-set for my taste so I drew them in a little closer together.


I used a satin stitch for the eyes. I first outlined the eye with stem stitch, then filled it in with sort of random straight stitches. This helps pad out the satin stitch and also serves as a backup layer if the outer stitches get damaged. (I also decided later, after finishing, to add pupils.)


I saw this method here on Pinterest for making looped bangs. I sewed one side and made the loops around pins as I went, then sewed across the loops on the bottom too.


The finished bangs!


I sewed the front hair to just cover the edge of the bangs. 


I gathered the hair from the center part into pigtails and tied them up with yarn and embroidery floss, then trimmed evenly. As the directions suggested, I spent a lot of time putting tacking stitches throughout the hair. This is a great tip - DON'T SKIP! It adds so much to the feeling of the doll and keeps everything so tidy and secure!

Here she is, hair done!


Moving on to the second doll! I was a little doubtful at first that the bun hairstyle was going to work. Because of the head shape, the ends weren't all the same length. But I fiddled and played with it for a while and came up with a pretty cute shape!


Buns tied, but before tacking the hair everywhere.


After tacking.


Second dolly is done!


These were definitely more complicated patterns than I used from the Wee Wonderfuls book. The four-piece head was trickier to sew, and hard to make the front seams smooth and invisible. But I really loved the effect.

I tweaked several aspects of the pattern but the bottom line is Wee Wonderfuls patterns are amazing and I will always love using them. This was 12 bucks well spent!

Again, pattern is available here.

Clothes and accessories are in my next post here!

Monday, June 22, 2020

Playing With Dolls

I've been a bit doll crazy lately! If I haven't been making them (or their clothes!) I've been dreaming and plotting and looking at pretty pictures on pinterest. (I keep doll ideas saved here and here.)

I've just finished two new dolls from the Wee Wonderfuls Kit, Chloe, and Louise pattern (post and pattern review coming soon!).

Kit, Chloe & Louise
Image from weewonderfuls.com

I've been a little obsessed by Willowynn dolls recently. Her work is amazing. Definitely more of an arty sits-on-a-shelf doll for adults than a squishy toy for kids.

Image from willowynn.com

Unfortunately, though she does sell sewing patterns, she doesn't have any for her human dolls. Still, I am so inspired by this style! I'm going to use a pattern from a doll book I already own by Jan Horrox to create something inspired by the look of Willowynn. Still in the very early planning stages!

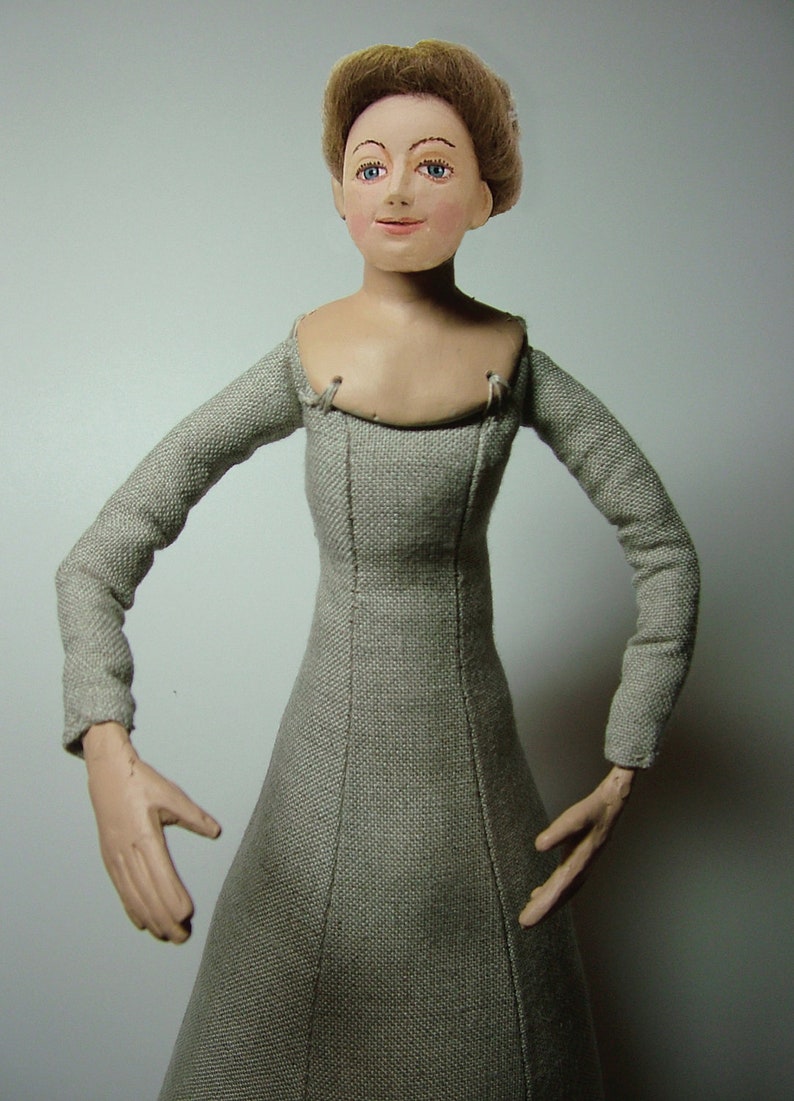
I've been wanting to make the Tudor Tailor doll for ages. I just bought the head and hands set and I already have the doll pattern in one of their books.

Tudor Woman Doll Kit  Brown Hair image 0
Image from The Tudor Tailor etsy shop

While I was at their etsy shop, I pre-ordered their new book, The Typical Tudor. I've been waiting years for this to come out!

I also have a ceramic head and hands set I bought on ebay ages ago. It needs painting and a body but fortunately doesn't need hair!


And finally, there's Sarah Prudence. I got her at an antique shop on my last birthday. She's a fairly mass-produced china doll from the 1980s, but in great condition and I think I can fancy her up a little.


I started by taking off her horrible hair and polyester clothes. I'm in the process of making her a c.1870 chemise and drawers. Of course, a corset, petticoats, gown, and accessories will follow!


I never really know what I'll get sewn - I'm so easily distracted! - but I've got plenty of ideas for dolly stuff for as long as this mood lasts.

Tuesday, March 17, 2020

A New Blouse

I finished a new blouse!


I used the same pattern as my Japanese floral double gauze blouse from a few years ago, McCall's 6124. 


I have to admit I'm not entirely thrilled with this pattern, ever after all my changes and fitting tweaks. I'm not sure if I'll continue to fuss with it for upcoming versions or start again with a different pattern.


The fabric is a very light weight 50/50 cotton and rayon blend. It's very soft! The colors are delightful and I love the print with all the sassy-faced ladies.


The fit in back is never as smooth as I hope, but it's pretty good.


The front and cuffs close with grey mother-of-pearl buttons I found in my stash. I like the way they disappear into the print.


I'm not used to buttoning my cuffs! When I wear this with a cardigan I will probably just leave them unbuttoned for easier rolling up of sleeves.


Yay! A blouse! I'm pretty happy with how it turned out!


This is currently on display at Treadle Yard Goods if you want to go visit it!

Monday, March 16, 2020

Free Pattern: Garter Wrap Hat

Finding a warm, practical hat that accommodates my hair is tough. Loose, baggy hats don't keep the cold out, and ear-warmers are often just too small. I wanted a hat that gave maximum ear and head coverage while still allowing plenty of space for my hair.

This is the second iteration of this hat; I liked the first one okay, but I didn't write it down, and then after a few years the hat went missing! (Don't worry - I found it as soon as I had knitted this one!) This time I worked more systematically and wrote down everything I did along the way.


Garter Wrap Hat

This hat is simply shaped at each end and has short rows worked over the top to enable it to curve over the head.

Gauge is not crucial as you will be measuring as you go. A tight, dense gauge will make a warmer hat.

I just barely squeezed two of these hats out of one skein of Cascade 220. You may need anywhere from half to a whole skein.

Size: 18" long by 6.5" wide, to fit a 22" head snugly
Yarn: Cascade 220 worsted weight wool (1 skein or less)
Needles: US 5 (or size to obtain gauge)
Gauge: 21.5 sts = 4" in garter stitch
Notions: two large safety-pin style stitch markers, row counter (optional but helpful), one 3/4" button, needle & thread


abbreviations

CO - cast on
BO - bind off
kfb - knit into the front and back of each stitch (to increase one stitch)
YO - yarn over needle
k2tog - knit two stitches together (to decrease one stitch)
ssk - slip, slip, knit (to decrease one stitch)
W&T - wrap and turn. Bring yarn forward between needles, slip next stitch, bring yarn to back, slip stitch back to left needle, turn work around to knit the other direction.

Directions

CO 5 stitches
Knit 1 row
K1, kfb, K1, kfb, K1 (7 sts)
Knit 1 row
Buttonhole row: K1, kfb, K1, YO, k2tog, kfb, K1 (9 sts)
Knit 4 rows
Place a safety pin style stitch marker on the side of the work facing you. (This hat has no right or wrong side, but the stitch marker on one side will help you keep track of rows.)

Next row: *K1, kfb, Knit to last 2 sts, kfb, K1
Knit 2 rows *

Repeat rows between * until you have 35 sts on your needle, ending with the Knit 2 rows. (If you would like the hat wider, continue to repeat the last 3 rows as desired.)

Place a stitch marker on the first stitch on the needle.

First short row: Knit to last 5 sts, W&T
Next short row: Knit to last 5 sts, W&T
* Knit 6 rows
Repeat two short rows *

Repeat rows between * until hat measures 13" from CO. Using your row counter can help you keep track of rows in this section.

This is a good time to check the fit. Wrap the hat around your head with the buttonhole at the back of your head, just under your hairline. Stretch the hat to a snug, comfortable fit, covering the forehead. Look in the mirror. The second marker you placed should fall symmetrically in the same place on your face as the live stitches on the needle. (For example, if the marker is at your eyebrow, the needle with live stitches should be at the level of your other eyebrow.) If you would like more length, continue repeating the rows between * until you have your desired length.


Begin decrease shaping: * Knit 2 rows
K1, ssk, Knit to last 3 sts, k2tog, K1*

Repeat between * until you have 9 sts

Knit 4 rows
K1, ssk, Knit to last 3 sts, k2tog, K1*
Knit 1 row
K1, ssk, K1, k2tog, K1*
BO last 5 sts

Sew a button to the BO end.

If you make this, please let me know!

Tuesday, January 7, 2020

My Year of Mittens!

I finished off my 2019 knitting goal just in time! Twelve pairs of mittens!


I ended up having to stop blogging about this project since some of them were secret gifts! But now they're all done and here's the round-up of all 12 pairs. With ravelry links if you want details!

Thrummed mittens


Colorblock mittens #1


Sailor's Rib fingerless gloves


Mittens to order


Blue Selbu


Colorblock mittens #2 (for The Girl)


Baby niece mittens


Yellow and grey Olines Vantar


Blue and grey Olines Vantar


Yellow and grey fingerless mitt


Colorblock mittens #3


Zigzag fingerless mitts


What a fun project this was! I met my goal of 12 pairs, although I didn't knit everything on my dream list. I got a lot more practice in stranded colorwork and I'm feeling pretty confident there!

I also made up the patterns for several of these, a few of which I might write down nicely and put up for free on ravelry.

I'm not sure what's next for me, but I already miss having a mitten always going! They are such handy little projects (pun intended!).