Showing posts with label knitting. Show all posts

Monday, March 16, 2020

Free Pattern: Garter Wrap Hat

Finding a warm, practical hat that accommodates my hair is tough. Loose, baggy hats don't keep the cold out, and ear-warmers are often just too small. I wanted a hat that gave maximum ear and head coverage while still allowing plenty of space for my hair.

This is the second iteration of this hat; I liked the first one okay, but I didn't write it down, and then after a few years the hat went missing! (Don't worry - I found it as soon as I had knitted this one!) This time I worked more systematically and wrote down everything I did along the way.
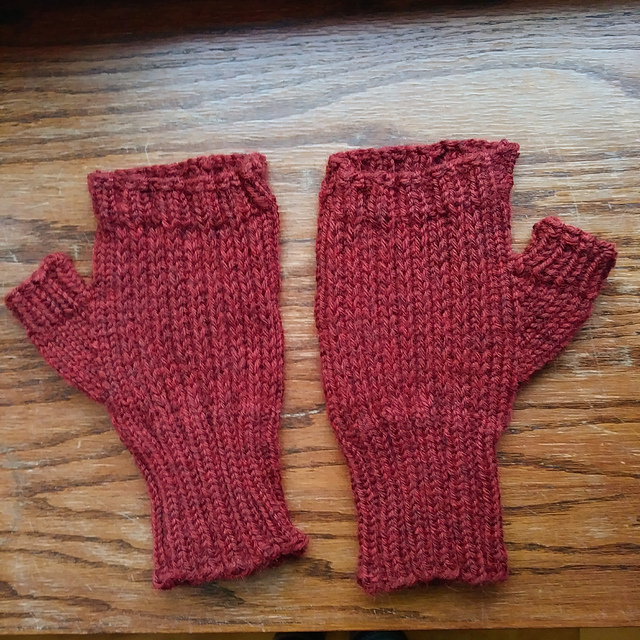

Garter Wrap Hat

This hat is simply shaped at each end and has short rows worked over the top to enable it to curve over the head.

Gauge is not crucial as you will be measuring as you go. A tight, dense gauge will make a warmer hat.

I just barely squeezed two of these hats out of one skein of Cascade 220. You may need anywhere from half to a whole skein.

Size: 18" long by 6.5" wide, to fit a 22" head snugly
Yarn: Cascade 220 worsted weight wool (1 skein or less)
Needles: US 5 (or size to obtain gauge)
Gauge: 21.5 sts = 4" in garter stitch
Notions: two large safety-pin style stitch markers, row counter (optional but helpful), one 3/4" button, needle & thread


abbreviations

CO - cast on
BO - bind off
kfb - knit into the front and back of each stitch (to increase one stitch)
YO - yarn over needle
k2tog - knit two stitches together (to decrease one stitch)
ssk - slip, slip, knit (to decrease one stitch)
W&T - wrap and turn. Bring yarn forward between needles, slip next stitch, bring yarn to back, slip stitch back to left needle, turn work around to knit the other direction.

Directions

CO 5 stitches
Knit 1 row
K1, kfb, K1, kfb, K1 (7 sts)
Knit 1 row
Buttonhole row: K1, kfb, K1, YO, k2tog, kfb, K1 (9 sts)
Knit 4 rows
Place a safety pin style stitch marker on the side of the work facing you. (This hat has no right or wrong side, but the stitch marker on one side will help you keep track of rows.)

Next row: *K1, kfb, Knit to last 2 sts, kfb, K1
Knit 2 rows *

Repeat rows between * until you have 35 sts on your needle, ending with the Knit 2 rows. (If you would like the hat wider, continue to repeat the last 3 rows as desired.)

Place a stitch marker on the first stitch on the needle.

First short row: Knit to last 5 sts, W&T
Next short row: Knit to last 5 sts, W&T
* Knit 6 rows
Repeat two short rows *

Repeat rows between * until hat measures 13" from CO. Using your row counter can help you keep track of rows in this section.

This is a good time to check the fit. Wrap the hat around your head with the buttonhole at the back of your head, just under your hairline. Stretch the hat to a snug, comfortable fit, covering the forehead. Look in the mirror. The second marker you placed should fall symmetrically in the same place on your face as the live stitches on the needle. (For example, if the marker is at your eyebrow, the needle with live stitches should be at the level of your other eyebrow.) If you would like more length, continue repeating the rows between * until you have your desired length.


Begin decrease shaping: * Knit 2 rows
K1, ssk, Knit to last 3 sts, k2tog, K1*

Repeat between * until you have 9 sts

Knit 4 rows
K1, ssk, Knit to last 3 sts, k2tog, K1*
Knit 1 row
K1, ssk, K1, k2tog, K1*
BO last 5 sts

Sew a button to the BO end.

If you make this, please let me know!

Monday, September 9, 2019

Year of Mittens: Summertime

In June I finished my blue Selbu mittens!


Then I made some colorblock mittens for my kid.


The next mittens I made are for a holiday surprise, but I don't think the recipient reads my blog. I made this pattern up and charted it on graph paper.


Then in August I made this pair of yellow and grey stranded mittens from the pattern Olines Vantar, available for free on Ravelry. I loved this pattern so much I immediately started another pair!


I'm still on track for my goal of one pair per month all year! And I still have loads of mittens I want to make!

Wednesday, June 26, 2019

Free Pattern: Knitted Elbow Patches

I tend to be pretty hard on my sweater elbows. I made the first pair of these last year for the hole-y elbows of a fine-gauge machine-knitted sweater. Since then I've had lots of people ask me about them so I decided to write down the pattern! It's so simple!


I used pretty much matching yarns but it would be fun to do a pair in stripes or contrast!

Knitted Elbow Patches

Yarn: Cascade Yarns 220 or Knit Picks Wool of the Andes worsted

Needles: US size 6

Gauge: 5 stitches per inch (but gauge is not crucial)

Notions: Small hand sewing needle, matching cotton sewing thread

Abbreviations:
K2tog - Knit two stitches together (decrease one stitch)
M1 - Make one (increase one stitch)
SSK - Slip, slip, knit (decrease one stitch)
Stockinette stitch: Knit one row, then purl one row. Repeat.

Directions:
Cast on 10 sts (I prefer long tail method)
Purl 1 row
Next row (increase row): K1, M1, knit to last stitch, M1, K1
Repeat last two rows until you have 16 sts.
Work even in stockinette stitch until piece measures 3” from beginning.
Next row (decrease row): K1, K2tog, knit to last 3, SSK, K1
Purl 1 row
Repeat last two rows until 10 sts left
Bind off all stitches on next row. (This is a purl row but you can bind off either knitwise or purlwise.)

Make 2. The edges will be curly so block if desired.

To help place them symmetrically on each sleeve, use a measuring tape to measure up from the cuff to edge of patch, and over from patch to sleeve seam.

To keep pins from getting stuck, slide a wide clear quilting ruler or small hardcover book inside the sleeve, then use straight pins to pin patches in place. Uncurl the edges as you pin.

Here you can see the patch pinned in place, getting ready to sew, and the clear ruler in the background.


Sew onto the elbow holes of your sweater with cotton sewing thread. I put an extra-large wooden darning egg (available here) inside the sleeve, but if you don't have one, just put your hand inside, or keep the clear ruler or small book inside.


Use an overcasting stitch to attach: scoop a little of your sweater fabric, then come up through the patch from below, letting the thread wrap around edge of patch.


If you make them, let me know what you think!

Wednesday, May 1, 2019

Year of Mittens: April

In April I only knitted one mitten. Not one pair, just ONE! 


This pattern was basically just the chart. There's about four lines of "directions" and otherwise you just get to puzzle it out. If you've made this style of mitten before, no problem! If not... well, it took some digging in other patterns and books for me to make this whole thing work.

So far I'm pretty pleased. The fit is good, though I could've made it longer, and I really like the dense fabric this made. On my March mittens, the thin fingering weight yarn made a pretty soft, light mitten. This mitten was knit in Wool of the Andes Sport on size US 2/2.75mm, so it's firm and hefty without being too thick.

Now I just have to knit another one!

Tuesday, April 16, 2019

Year of Mittens: March

For March I made the second mitten from the pair I began in January.


I was pretty pleased with how this pair turned out. The yarn is Knit Picks Palette fingering weight wool, which is the smallest yarn I've made mittens with so far, and the smallest yarn I've done stranded colorwork with too.


The pattern is Mittens to Order, a free Ravelry downloadI adjusted the pattern to add length, both because my row gauge was short and because the math seemed to be a little off in the pattern. This involved adding more pattern repeats to the chart; when I got to the last row of a main motif, I went back down the chart a few rows and started again. I also lengthened the thumb gusset and the thumb itself.


The first mitten I knitted (right hand) fitted very well! My mods worked and it was a smooth, perfect fit, just snug enough. But the second mitten came out much smaller!

This was very frustrating as I was so careful about measuring and keeping notes. I have never had a gauge so irregular, so I have to believe I just wrote down the wrong needle size. I must have knitted the first one on a US 3 and the second on a US 2.5.

Blocking helped a little but there's really no changing the size difference. The left one is slightly small for me, but not too small to wear. I still like them!

They are VERY thin, though, from being made with such lightweight yarn. I do love the intricate designs you can make with finer yarns, but I think for future mittens I might stick with sport and worsted.

Tuesday, March 5, 2019

Year of Mittens: February

I finished one pair of mittens for February, which means I'm right on my goal, but after a more productive January I feel behind now!

I knitted these fingerless mitts at a pretty leisurely pace and finished them just as February ended. They're going to be a birthday gift for The Man in a few weeks.


They were a pretty simple knit once I got going. The hardest part was following written-out directions when I am so used to charts. When I started knitting I never thought I'd say that! But the language just felt so cumbersome and random.

The back of the hand is patterned in a broken rib which has a great texture I love. These next two photos are post-blocking.


The palm side is knitted in a slip-stitch pattern that gives the look of a chunky rib and also has the effect of pulling the knitting in and shaping the mitt over the curve of the hand. You can see below how the palm side is a little shorter and it's drawing in. I'm not sure if that's intentional in the pattern but I like it.


I used Wool of the Andes Worsted in Garnet Heather. It took just over one skein, so I now have an extra 90% of the second skein hanging around.

Wednesday, February 6, 2019

Year of Mittens: January

I finished my first month in my Year of Mittens challenge!


For January I'm ahead of my goal of one pair per month! So far I'm having a blast making mittens! They're small and pretty quick and I can try out all kinds of new styles and techniques.

Each month, I'm planning to do a mitten review post of what I knitted. I'll give Ravelry links to my projects (where most of my detailed notes are!) and direct links to patterns if available.

The first pair I finished was made with thrums - little pieces of wool roving that you twist and knit into a stitch. This makes a super fluffy, warm inside!


Unfortunately, they ended up super duper huge for me, so I gave them to my husband, who loves them. 

I used Cascade 220 and Knit Picks Wool of the Andes roving. Pattern is a free Ravelry download.


Next I started a pair with a stranded colorwork pattern. I love this one so much! But it was a little slow with the finer yarn and needles and so far I've only made ONE!


The yarn is Knit Picks Palette and the pattern is Mittens to Order, a free Ravelry download.


This is still a UFO and I'll knit the other one in February.

After that I made a simple pair with colorblocking. I based them on this pair I saw on Pinterest


They are mostly Knit Picks Wool of the Andes worsted, but I threw in a little Cascade 200 and some Dream in Color Classy from the stash. I love these and they are my new everyday pair!


The pattern is loosely based on Mitts that Fit, which I've used, altered, and re-imagined a dozen times over the years.

I'm excited to keep making mittens!

Sunday, January 6, 2019

2019: My Year of Mittens!

In 2019, I'm knitting a year of mittens!


My goal for this year is to knit one pair of mittens per month. I'm hoping to try out several new styles and techniques, including lots of colorwork!

You can follow along over at my Ravelry if you're a Revelry member, or here at my blog!

Sunday, August 6, 2017

A Knitted Shawl

I've got a bit of a backlog of projects I want to post here, but this shawl is the one I'm currently the most excited about!


I bought these two skeins of self-striping gradient yarn at a fiber fair several years ago. They languished in my stash until I got sick of looking at them, then a few months ago I started this shawl as an easy project to knit in the evenings in front of the TV.


The body is plain stockinette with yarn-over increases and the lace edging is super simple. My yarn is worsted weight so I got a fairly big shawl pretty quickly. The pattern is the Kindness Shawl, found as a free download on Ravelry. (It feels silly, but the fact that my yarn was the same color scheme as the pattern image did catch my eye!)


I experimented with wearing it wrapped up like a scarf. It's cute, but a little bulky.


My bottom lace border is not perfect, because I stopped mid-repeat. I used every last inch of this yarn to finish and bind off!


Here it is before blocking.


I gave it a pretty hard block and it really opened up!


You can see my Ravelry project page for this project here.

Saturday, August 8, 2015

A Little House Dress

I have been obsessed with the Little House books by Laura Ingalls Wilder since childhood, and I have always wanted to make a dress inspired by them. I got my chance recently, and made this dress for Costume College 2015. 


We had a small meetup of Little House enthusiasts! 


Laura Ingalls wrote about receiving a copy of Tennyson's Poems for a christmas gift, and having a particular fondness for his works. I obtained a small copy of selections of Tennyson's poems to use as a prop for my costume.


At Costume College I also taught an Irish Ceili dance class while wearing this dress.


Dress notes: The dress is made in the style of 1883 in a cotton print fabric from Moda. Being from Minnesota I really ought to have made something from when Laura Ingalls' family was living closest to where I am, but I just felt like doing '80s, even though they were in Dakota Territory by then. While not a direct reproduction of any of Laura's dresses described in her books, I wanted to make something that she or someone in De Smet might have worn.

Laura in De Smet, Dakota Territory in the 1880s.


I was inspired by these two dresses in the book Fashion in Detail, made in small scale cotton prints.


Construction: I made the skirt with French seams so I spent some time fiddling with making the pocket and placket cooperate. A couple internet tutorials helped: in-seam pockets with French seams from Sew Mama Sew, and skirt placket in a French seam from Diary of a Renaissance Seamstress. The skirt has a wide hem facing of plain cotton.

I sewed four lengths of twill tape inside the underskirt, one each at the two side front and side back seams. These tapes had hooks at the ends which connected to eyes in the skirt seams, enabling me to shorten the skirt temporarily to teach dancing.

The bodice is flat-lined with plain woven cotton broadcloth. The sleeves are lined with cotton lawn, and have a wide facing at the wrist so the full-length sleeve can be cuffed into a 3/4 sleeve. The bodice closes with functional buttonholes and metal buttons depicting oak leaves and acorns. The entire dress was sewn on the machine. I only hand sewed the edges of the bodice facings.

There are spiral bones in the curved side back seams and straight white steels in the front darts and side seams.

Patterns: the bodice pattern is from the green ruffle dress. I altered it by raising the shoulder line, creating a new neckline, adjusting the lower edge shape, and making a narrower sleeve, all to make it more 1880s than 1870s.

The skirt pattern is the 1883 skirt from the book The Cut of Women's Clothes by Norah Waugh. The overskirt I made up and draped through trial and error.

I copied the front pleated overskirt detail from one of the Fashion in Detail dresses. The overskirt back is made into puffs held up with hooks and eyes sewn onto twill tape. Because the puffs aren't permanently sewn, ironing and storage are a little easier.


Undies: Laura describes her preference for a smaller bustle in one of the later books, set in the mid-80s when the bustle was at its peak, so I made a small ruffled pad to fill out the late Natural Form shape. I also wore my white Victorian corset and a single, ruffled petticoat.


The lace: I knitted a small strip of lace to trim the neckline. The pattern is French lace from the Ladies' Guide to Elegant Patterns (Ravelry link). I knitted it on size 000 needles with sz 12 DMC Perle cotton.