I had thought about buying a nice fancy com badge, but I was feeling thrifty so I decided to pull this together from scraps I had on hand. I like the way it turned out a lot! It's 3-dimensional, which makes it much more realistic than embroidered or appliqued ones, and since it was so cheap and easy to make it's perfect for kids and/or more casual costuming.
What you'll need to make this:
- 3" x 6" piece of fusible Peltex interfacing
- 4" x 4" piece of Wonder-Under fusible web
- 4" x 4" piece of yellow cotton fabric
- 4" x 4" piece of silver lame fabric
- 2" x 3" piece of felt
- Metallic gold fabric paint
- Pin back
- Hot glue gun or fabric glue
- Thread and needle
- Basic sewing supplies
- Printout of your com badge
For the silver part, I used a metallic lame fabric, and for the gold, I used metallic paint on plain cotton. You could definitely use metallic paints for both fabrics, or try to find metallic fabrics for both parts instead of doing any painting. This is just what I had on hand.
There are tons of different com badge styles for the various series. A Google search brought up loads of charts and images. The one I chose is from an eBay product listing of a repro com badge for sale.
What To Do:
Trace your com badge components and cut out of the fusible Peltex. Make sure you cut this with the fusible side facing UP. I did this wrong the first time and ended up with a mirror image shape.
Also, don't be afraid to spend time making tiny adjustments to the shape. Details matter, and you want the right shape and perfectly smooth edges here, because you can't fix it later.
Fuse the Peltex shape to your silver lame: put the Peltex piece on the ironing board, fusible side facing up. Lay the lame over the top. Cover it with a pressing cloth. With your iron set to a medium heat and steam, press firmly for about 10 seconds. Don't move it until it is cool.
Trim the excess lame around the shape to about 3/8". (Please note this photo is of the one I traced backward. Oops!)
Fold to the wrong side and sew in place, using long stitches to connect the opposite sides like a ladder. Fiddle with the corners to make them nice and pointy and then stitch them firmly.
It's probably possible to use glue for this step, but I don't recommend it. Glue is messy, slow, and much more difficult to make smooth. I know this because I tried it on my first (backward) attempt! Sewing it is quick and simple and you don't have to care much what the stitches look like because they will be covered up later!
When you're done it should look like this.
Set aside and move onto the gold part!
Apply the Wonder-Under to your yellow cotton fabric. Leave the paper backing on.
If you've never used Wonder-Under before, its job is to make any fabric into an iron-on fabric. First you fuse the Wonder-Under to the fabric, then you fuse the fabric to whatever you want! I happened to have a yellow scrap with Wonder-Under already fused on to it, or I might not have bothered, since the Peltex is already fusible, but it did make some of the next steps easier.
On the other side, paint a few coats of gold metallic paint. Wait for it to dry. (If you're using gold fabric, skip this step.)
Peel off paper backing. Place your Peltex shape on the ironing board, fusible side up, and put your painted fabric on top, fusible side down. (Fusible sides of each should be touching.) Cover with a press cloth.
Press lightly, just in the center, using the tip of the iron only. You don't want to fuse the whole piece of fabric to your ironing board! Just the middle of the oval shape.
Trim the edges and notch the fabric. This makes them turn in more smoothly. Be careful not to notch too close to the Peltex or you'll have a cut in your finished edge.
Fold all the edges over and press to fuse them down. I did this by placing my press cloth on the ironing board, then putting my oval piece on it and gathering the cloth up around the oval shape. The press cloth pulls the edges in and keeps them neat while you iron over the whole thing.
All done!
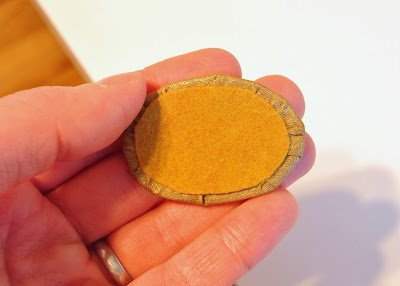
Warm up your hot glue gun, or get out some fabric glue. Cut an oval of coordinating-color felt a little bit smaller than your gold oval. Glue in place.
Glue your two pieces together.
Find a pin back. I got this one at a craft store but I actually ended up ripping it off later and using a safety pin instead, because this pin back had a very thick pin! I could not pin it to the costume without damaging the fabric. So check your pin first.
Glue in place. You can see that I am super messy at hot glue. But that's okay, because it's the back, and no one's gonna see it!
The finished communicator.
It was a perfect accessory for her costume!


No comments:
Post a Comment